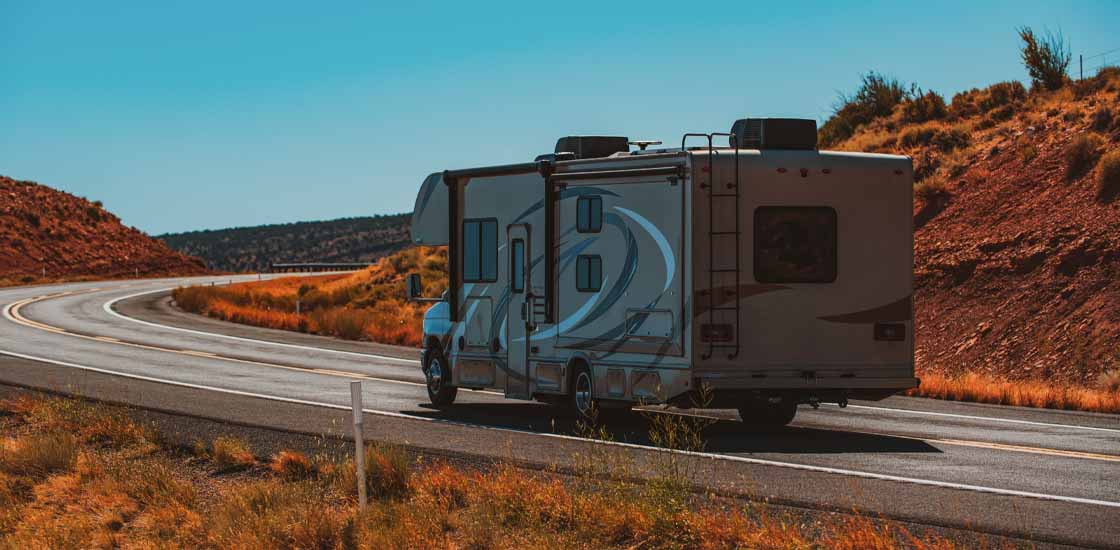
If you follow the RV lifestyle, you know the freedom is priceless. But so is your rig. With RV theft on the rise—driven by organized crime rings focusing on expensive components—relying on a simple pin lock isn’t enough anymore. The goal isn’t just to keep your RV safe; it’s to make it such a massive pain to steal that a thief decides to move on to an easier target.
This post breaks down the Three Layers of Physical Deterrence—a foundational security approach every modern RVer needs, based on the latest 2025 security analysis.
The Evolving Threat Landscape: Understanding the RV Thief
Before we dive into the physical layers, we must understand the motivation and methods of the modern RV thief. The days of opportunistic theft are being replaced by organized, targeted operations. Your security strategy must evolve to meet this new threat.
The Thief’s Calculus: Risk vs. Reward
A professional thief operates on a simple calculation: Time + Risk = Failure. Their primary enemy is time. The longer it takes, the greater the risk of being seen, heard, or caught. Your objective is not to create an impenetrable fortress, but to stack so many layered delays that the cost (in time and risk) outweighs the potential reward, causing them to select an adjacent, easier target.
There are three primary targets:
- The Entire RV (The Grand Theft): This is usually for high-value Class A motorhomes, late-model travel trailers, or fifth wheels, often stolen for resale, transport across borders, or as mobile bases for other criminal activities. This requires defeating Layers 1 and 2.
- High-Value Components (The Quick Score): Thieves often target specific, easily detachable items like catalytic converters (especially on diesel models), batteries, solar panels, and high-end generators. This is a five-minute job.
- Interior Valuables (The Smash-and-Grab): Targeting electronics, firearms, cash, and sensitive documents. This requires defeating Layer 3 (or the initial door lock).
Understanding this calculus means focusing on layered redundancy. If one lock fails, the next one is already in place, buying you precious time.
The Deterrence Mindset: Psychological Warfare
Effective physical security is 50% hardware and 50% psychology. Thieves are risk-averse; they want quick, quiet scores.
- Visibility is Key: Highly visible, brightly colored devices (like yellow wheel clamps) are often more effective than subtle, hidden ones for the initial deterrence. The thief sees the effort required before they even approach the RV.
- The Look of Complexity: Using three different types of locks from three different manufacturers (a puck lock, a wheel clamp, and a chassis lock) forces the thief to carry three different sets of tools, multiplying their required time and noise output.
Layer 1: Immobilize the Hitch (The First Barrier)
Layer 1 is dedicated to preventing the towable RV from being connected to an unauthorized vehicle. This layer is non-negotiable for all travel trailers, fifth wheels, and toy haulers. It must be robust enough to withstand significant prying, cutting, and drilling attempts.
1.1 Hitch Security for Travel Trailers (Ball Couplers)
Travel trailers use standard ball couplers, making them the easiest to steal. You must physically fill and cover the receptacle.
Puck Lock Design: The Minimalist Masterpiece
The puck lock is the gold standard for coupler security because of its design.
- Function: It is shaped like a hockey puck, minimizing the exposed shackle area. Instead of a U-shaped shackle, the locking bolt slides into the coupler’s receiving channel.
- Defeat Resistance: The lack of an exposed shackle makes it almost impossible to cut with bolt cutters. Defeating it requires an angle grinder with a very small wheel and precision—a noisy, spark-producing, high-risk activity that draws immediate attention.
- Selection Criteria:
- Material: Must be hardened steel, preferably chrome-plated or powder-coated to resist rust.
- Lock Cylinder: Opt for a high-security disk detainer or tubular cylinder (sometimes called “seven-pin”) over standard wafer locks, as they are highly resistant to picking and bumping.
- Fit: The lock must fit snugly against the coupler. Excess space allows prying tools (like a crowbar) to gain leverage.
The Safety Ball Tactic: Filling the Void
The simple Safety Ball is often overlooked but provides invaluable supplementary protection.
- How it Works: The Safety Ball is a steel or heavy composite ball that is inserted into the coupler socket after the puck lock is engaged. Its diameter is slightly larger than a standard hitch ball.
- Redundancy: Even if a thief manages to pick or drill the puck lock, the Safety Ball physically blocks them from inserting a standard 2-5/16″ or 2″ tow ball. They must then deal with the Safety Ball, which is often flush with the coupler lip and offers no leverage for removal. This adds 5-10 minutes to the theft attempt.
- Implementation: Always use a Safety Ball in conjunction with a coupler lock, never as a standalone security measure.
Coupler Cranking Prevention
Some determined thieves will not try to hitch the RV, but will simply hook chains around the axle and drag it away, causing massive damage. To prevent this, you need to immobilize the front jack/levelers.
- Jack Pad Lock: Use a simple pad lock through the hole in the manual jack handle or a custom-made steel collar with a padlock to prevent the jack from being cranked up. If the RV cannot be raised to hitch height, it cannot be towed level, making it extremely difficult and noticeable to steal.
1.2 Fifth Wheel and Gooseneck Security
Fifth wheels present different but equally critical vulnerabilities, primarily at the kingpin.
The Kingpin Lock: Covering the Vulnerability
A kingpin lock is essential. It must enclose the pin to prevent connection to a fifth wheel hitch plate.
- Standard Collar Locks: These wrap around the bottom of the kingpin. The best designs feature a tubular lock that is recessed, making it difficult to drill or cut.
- High-Security Enclosures: The most secure options are bright yellow, heavy-duty collars that cover the entire lower section of the kingpin. Their color serves as a highly visible deterrent, and their bulk prevents shimming or prying.
Landing Gear Lock Strategy
Fifth wheels have robust landing gear that acts as a secondary layer of immobilization.
- Gear Handle Locks: Locking the manual crank handle prevents a thief from raising or lowering the RV. Use a simple, robust padlock to secure the handle bracket.
- Electronic Override Protection: If your fifth wheel uses hydraulic or electric landing gear, the control panel (often in the basement compartment) is a target. Ensure the basement door is locked (see Layer 3) and consider a secondary hidden switch or circuit breaker to disable power to the landing gear motor. A thief will assume a fault and move on, rather than wasting time diagnosing an electrical problem.
1.3 Receiver Locks: Securing When Connected
When towing, the threat shifts to the separation point between the truck and the hitch itself.
- Pin vs. Keyed Lock: Never rely on the standard retaining pin. Use a keyed, hardened steel receiver lock that passes through the hitch receiver and the ball mount. This prevents someone from pulling your ball mount (and thus your RV) out of the truck’s receiver.
- Cylinder Orientation: When installed, orient the lock cylinder downward. This makes it harder for a thief to apply lubricants, drill, or pick the cylinder from above, particularly if they are working quickly at night.
Layer 1 Summary: The key to hitch security is multi-point redundancy. Use a coupler lock, a Safety Ball, and a jack lock (for trailers) OR a kingpin lock and a landing gear lock (for fifth wheels). The goal is to make the connection process lengthy and noisy.
Layer 2: Immobilize the Chassis and Wheels (The Backup Plan)
Layer 2 kicks in if Layer 1 is somehow defeated or bypassed. This layer is specifically designed to prevent the RV from rolling, making towing impossible without specialized (and highly conspicuous) equipment. It’s the physical, immovable obstacle that demands a thief bring heavy-duty equipment and spend a minimum of ten minutes making sparks and noise.
2.1 Wheel Immobilization: The High-Visibility Deterrent
Nothing screams “stolen RV in progress” like an RV being towed down the road with a massive, brightly colored wheel clamp still attached.
Wheel Clamps: The Gold Standard
Wheel clamps are the single most effective, visible deterrent for towable RVs.
- Coverage is Crucial: The best clamps do more than just block the wheel. They wrap around the tire and often extend across the rim, physically preventing the removal of lug nuts. Look for designs that also include a disc that covers the center lug nut area.
- Dual-Clamp Strategy: If possible, use two clamps—one on each side of a single-axle RV, or one on the front axle and one on the rear axle of a tandem setup. This ensures that even if one clamp is defeated, the other remains.
- The Chock Lock: For tandem-axle RVs, the chock lock (or X-Chock) is an excellent, low-profile alternative. It fits between the tandem tires and expands, applying pressure to both wheels simultaneously, thus preventing them from turning. While primarily used for stabilization, a high-quality, lockable chock lock provides a strong immobilization feature.
Tire Chains and Anchor Points
For long-term storage or in areas of extreme risk, add a hardened steel chain.
- Anchor Point: Chain one of the RV’s wheels to an immovable object. This could be a secure, permanent fence post, a large tree, or a dedicated ground anchor (a specialized steel ring cemented deep into the ground).
- Chain Specification: Use Grade 80 or Grade 100 transport chain with boron-steel alloy. These chains resist the cutting blades of even large bolt cutters.
- Padlock Integration: The chain is only as strong as its padlock. Use a dedicated security padlock (like a shrouded shackle or discus lock) with a hardened steel body.
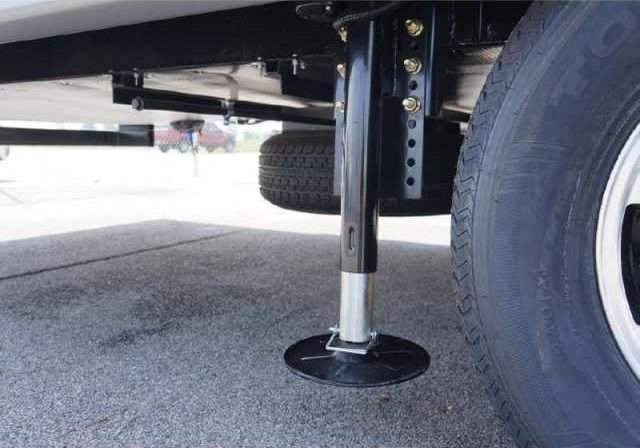
2.2 Chassis Defense for Towables (Levelers and Jacks)
Layer 2 isn’t just about wheels; it’s about the entire chassis integrity.
Stabilizer and Leveler Locks
For motorized jacks or leveling systems, the thief’s goal is to quickly retract them and hit the road.
- Hydraulic/Electric System Disablement: For hydraulic or electric leveling systems, install a hidden kill switch on the control wiring (e.g., in the fuse box or a hard-to-reach compartment). This physically breaks the circuit to the pump or motor. Even if a thief finds the main control panel, the system will appear dead, frustrating the attempt.
- Jack Pad Removal: In extremely high-risk environments, removing the jack pads or feet when parked can be a surprisingly effective deterrent. If a thief tries to tow the RV with the bare jacks dragging on the ground, the friction will be immense, making the theft far too slow and noisy.
Slide-Out Lockout
A stolen RV with a deployed slide-out is a guaranteed crash risk.
- Manual Locks: Install simple, heavy-duty deadbolts or specialized slide-out locks (similar to those used in cargo shipping containers) to prevent the slide from being retracted. This makes the RV impossible to transport safely or quickly.
2.3 Motorhome-Specific Chassis Security (The Cab)
Motorhomes (Class A, B, C) require a different approach, focusing on the engine and steering control.
Steering Wheel and Pedal Locks
These classic physical deterrents are still highly valuable, especially when upgraded with modern features.
- The Universal Bar: A simple, high-visibility bar extending from the steering wheel to the brake pedal prevents both from being used. Choose a model with a flashing LED light to draw attention, even when turned off.
- Advanced Steering Clamps: Look for full-coverage steering wheel clamps that enclose the entire wheel, making cutting through the steering wheel rim pointless.
OBD II Port Security: The Digital Threat
Modern motorhomes are vulnerable to digital theft—where a thief plugs into the On-Board Diagnostics (OBD II) port and programs a new key fob in minutes. This is often the primary method for stealing modern trucks and motorhomes.
- Locking Ports: Install a hardened steel OBD II locking box that bolts around the port, preventing physical access to the diagnostic interface.
- Port Relocation: A highly effective, but complex, method is to professionally relocate the OBD II port to a hidden location and install a dummy port in the original location. The thief wastes critical minutes attempting to use the non-functional port.
Fuel and Ignition Kill Switches
This is the ultimate secret weapon of Layer 2 for motorized units.
- Hidden Circuit Breakers: Install a hidden, non-obvious kill switch that interrupts a critical circuit, such as the fuel pump relay, the ignition coil, or the starter solenoid.
- Placement: The switch must be placed in a unique, non-standard location that only the owner knows—under a floor mat, behind a specific trim panel, or inside a non-functional appliance. This renders the motorhome inoperable, even if the thief has the original key.
Layer 2 Summary: Chassis and wheel security is all about immovability and delay. Use high-visibility clamps or chocks, and for motorhomes, prioritize digital defense (OBD II lock) and power interruption (kill switch).
Layer 3: Internal Protection (Securing Access and Valuables)
Layer 3 addresses what happens if the outer physical layers are compromised or if the threat is a simple break-in (smash-and-grab). This layer focuses on entry point hardening, securing valuable digital data, and creating redundancy in internal storage.
3.1 Hardening Entry Points
The main door, windows, and storage hatches are the thief’s points of access.
Door Security and Smart Locks
While the focus of the “RV Security 2025” analysis is on smart technology, any lock is useless without a hardened door frame.
- Deadbolt Reinforcement: Most RV deadbolts latch into a thin aluminum or wood frame. Upgrade to a strike plate reinforcement kit, which uses longer screws that anchor the strike plate deep into the wall stud or metal chassis behind the frame. This prevents a simple kick from splintering the door frame.
- The Smart Lock Trade-off:
- Pro: Provides keyless entry, remote monitoring, and tamper alerts via an app (if connected to a reliable network).
- Con: Requires reliable power and can be susceptible to advanced electronic bypassing or jamming.
- Best Practice: Choose a dual-cylinder lock (manual key and digital keypad). This ensures that if the battery fails or the digital system is jammed, you still have a robust manual deadbolt.
- Auxiliary Door Locks: Consider adding a secondary lock like a sliding barrel bolt or a small, robust security bar (like a ‘door brace’) that can only be engaged from the inside.
Window and Hatch Security
Windows and storage hatches are often the weakest links.
- Window Pinning: For sliding windows, drill a small hole through the overlapping frames and insert a strong metal pin or a simple screw. This physically prevents the window from being slid open from the outside.
- Hatch Reinforcement: RV storage hatches use notoriously flimsy locks. Replace them with high-security cam locks made of hardened steel. Crucially, replace all the locks with a set that uses a unique key. Most RVs from the factory use generic keys (like the “CH751” or similar) that fit hundreds of thousands of other RVs, rendering them useless.
3.2 Securing High-Value Assets and Data
The goal here is to make removing valuables either impossible or too time-consuming to attempt.
Chassis-Anchored Safes: The Unmovable Object
As noted in the original post, anchoring to the chassis is paramount.
- Installation Technique: This is a professional-level install. The safe must be placed where it can be bolted directly through the RV floor and into the metal frame of the vehicle (the chassis rail). This requires drilling through the chassis and using grade 8 hardened steel bolts, washers, and nuts to secure it from the underside.
- Location Strategy: Place the safe in a location that is difficult for a thief to work in—under a dinette bench, inside a shallow closet, or in the very rear of a cabinet. The cramped working space increases the difficulty of using power tools.
- Contents: Limit the contents to essential documents (titles, insurance, passports, physical data backup drives, emergency cash, and registered firearms). Never store everyday items here.
Digital Data Security and Redundancy
In a break-in, a thief might steal a laptop or external drive. The true loss is the data.
- Cloud Redundancy: Use encrypted cloud storage for all critical documents and photos. Ensure that your physical backup drive stored in the safe is an encrypted drive requiring a strong password.
- Wipe-on-Theft Software: Utilize software that allows you to remotely wipe the contents of your laptop or phone if it is stolen, protecting your identity and financial information.
3.3 Deterrence Systems: Alarms and Monitoring
While Layer 3 is primarily physical, it’s heavily supported by electronic monitoring.
- Multi-Zone Alarm Systems: Install an alarm system that monitors multiple zones: door/window contacts, internal motion sensors, and a vibration sensor on the chassis itself (to detect wheel clamp tampering).
- Cellular Notifications: The alarm system must use cellular (4G/5G) communication, not just Wi-Fi, to ensure alerts are sent even if the campground Wi-Fi is down or disabled. Immediate notification allows you to call law enforcement before the theft is complete.
- Internal Camera Placement: Place internal cameras (e.g., small, discreet, battery-powered Wi-Fi cameras) in areas that are not immediately obvious from the entry point. The primary purpose is to capture evidence and provide real-time alerts.
Layer 3 Summary: Secure entry points with reinforced deadbolts, eliminate generic lock keys on hatches, and secure high-value data and assets in a chassis-anchored safe.
The Fourth Dimension: Integration, Routine, and Advanced Tactics
Implementing the three layers is only half the battle. The other half is ensuring the system is used consistently, intelligently, and is supported by a strong digital backbone.
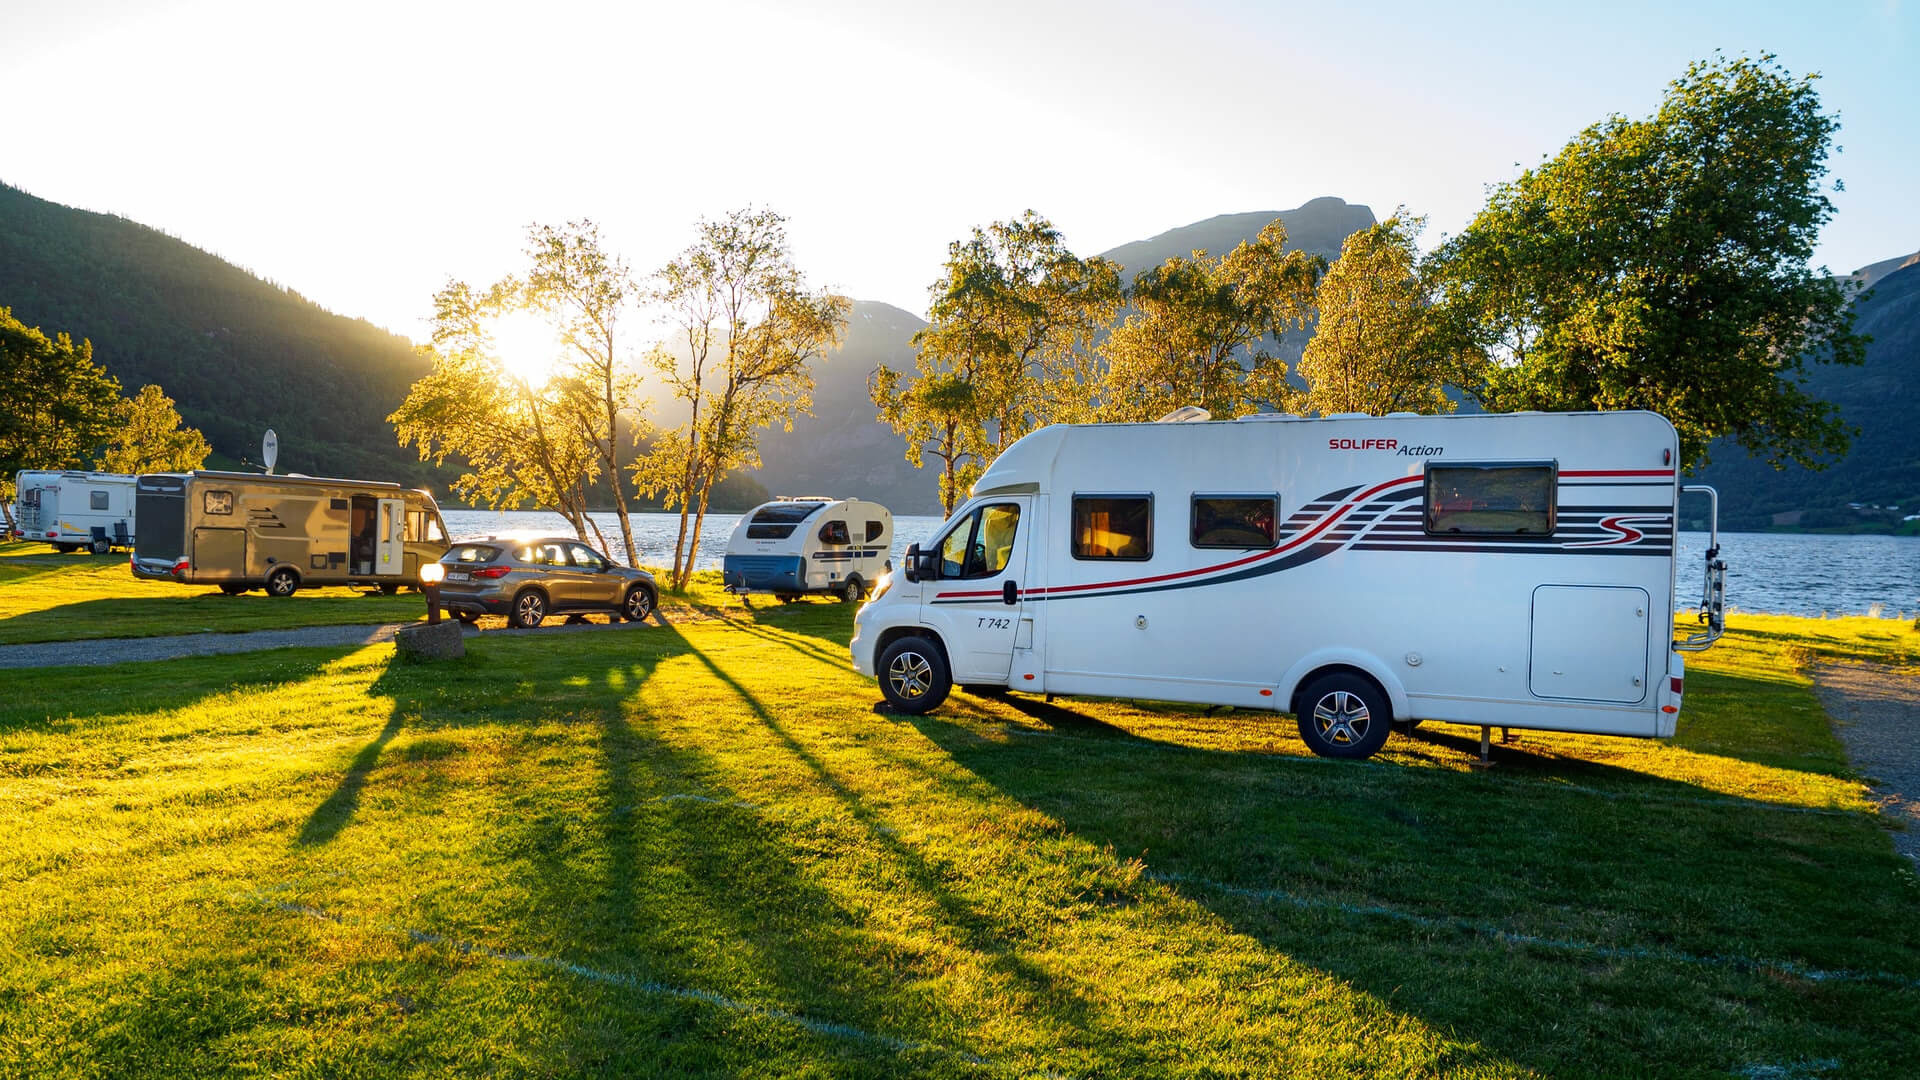
4.1 Security Site Selection and Parking Strategy
Your choice of campsite can dramatically enhance or compromise your security layers.
- The “Hiding in Plain Sight” Rule: When boondocking or dry camping, avoid parking in isolated spots that are easy to access and observe. Instead, park near other RVers or near the edge of a well-lit area where your RV is naturally in the sightline of others.
- Physical Barriers: Use the environment to your advantage.
- Motorhomes: Always park the front (driver/passenger side) as close to a fixed object (a tree, a boulder, a wall) as possible. This prevents the door from opening wide and restricts the access area for a quick getaway.
- Towables: Position the tongue or front of the trailer facing an immovable barrier or park the tow vehicle (if possible) close to the hitch, making it impossible for a thief to maneuver their own truck into position.
- Lighting: Utilize motion-activated, battery-powered LED floodlights. Place them high up on the corners of the RV, angled to illuminate the hitch and the wheels. Light is the enemy of the stealth thief.
4.2 Establishing a Security Routine (The Checklist)
Complacency is the single biggest threat. A routine ensures all three layers are active every time you leave the rig.
| Action Point | Layer Protected | Checklist Frequency | Notes |
|---|---|---|---|
| Puck Lock/Kingpin Lock Engaged | 1 (Hitch) | Every time unhitched | Visually inspect lock cylinder for foreign objects. |
| Safety Ball Inserted | 1 (Hitch) | Every time unhitched | Confirms coupler socket is physically blocked. |
| Wheel Clamps Installed | 2 (Chassis) | Long stops (>12 hours) or Storage | Must cover the lug nut area for maximum effect. |
| Kill Switch Engaged | 2 (Chassis) | Every time leaving Motorhome | Confirm engine will not turn over before locking up. |
| Deadbolt Locked (Manual) | 3 (Internal) | Every time leaving | Do not rely solely on the smart lock; use the manual key. |
| Hatch/Window Pins Secured | 3 (Internal) | Overnight or Long Stops | Prevents silent, non-violent entry. |
| Valuables in Chassis Safe | 3 (Internal) | Long stops or Storage | Passports, cash, backup drives are secured. |
| Camera/Alarm System Armed | 3 (Monitoring) | Every time leaving | Check app to confirm system status and network connectivity. |
4.3 Advanced Digital Integration (The 2025 Edge)
The next step in RV security involves integrating the physical layers with digital tools, as highlighted in the broader 2025 security analysis.
GPS Tracking and Asset Recovery
A sophisticated thief will often tow a stolen RV to a temporary “cooling spot” for 24-48 hours to ensure it hasn’t been flagged or tracked. Your GPS must survive this cooling period.
- Multiple, Hidden Trackers: Do not rely on one tracker. Install at least two.
- Primary Tracker: Hard-wired to the RV battery, hidden deep within a compartment (e.g., behind a false wall in the basement storage). It must have its own internal backup battery.
- Secondary Tracker (Decoy): A cheap, battery-operated tracker (like an AirTag or Tile, depending on your environment) placed in an obvious but non-essential location. The thief finds and disables the decoy, believing the threat is neutralized.
- Third Tracker (Deep Hidden): A small, long-life battery tracker sealed and hidden in an obscure location, such as inside the hollow frame of a dinette seat or within the plumbing chase. This is the one that will ultimately lead police to the recovery location.
Network Security (VLANs for the Digital Nomad)
For those who rely on the RV as a mobile office, securing the internal network is critical to prevent cyber theft.
- VLAN Implementation: If you use a sophisticated router, establish a Virtual Local Area Network (VLAN).
- Guest VLAN: For visitors and smart devices (thermostats, cameras). Give this limited access to the internet only.
- IoT/Security VLAN: For the security cameras and alarm systems. Block all communication out of this VLAN except to the alarm company’s servers.
- Critical Data VLAN: For your work computers and sensitive data. Completely isolate this from the other two networks.
- VPN Use: Always connect critical devices (laptops, phones) through a Virtual Private Network (VPN), even when using your own private RV Wi-Fi. This encrypts the data stream from end-to-end, protecting against eavesdropping if a thief were to compromise your network perimeter.
4.4 Insurance and Documentation
Security measures also serve a vital role in recovery and financial protection.
- Document Everything: Take high-resolution photos of all installed security devices (clamped wheels, locked hitch, safe location, kill switch placement) before you need them. Provide these to your insurance agent.
- The Benefit of Security: Some RV insurance carriers offer premium discounts for documented security measures, such as professional installation of GPS trackers, upgraded alarm systems, and high-security locks. Always inform your carrier of the full extent of your security layers.
- Engraving/Marking: For high-value components (generators, solar panels), etch or engrave your VIN or license plate number onto the equipment. This makes the items harder for thieves to sell and easier for law enforcement to identify.
Securing Your Freedom: The Final Commitment
The modern RV lifestyle demands a proactive stance against theft. The “Three Layers of Physical Deterrence” provides a structural framework:
- Layer 1 (Hitch/Coupler): The primary delay, preventing unauthorized hookup with locks, balls, and jack immobilization.
- Layer 2 (Chassis/Wheels): The immovable obstacle, preventing the RV from rolling away with high-visibility clamps, chains, and motorized kill switches.
- Layer 3 (Internal/Access): The containment field, securing entry points with reinforced locks and isolating valuables in a chassis-anchored safe.
Security isn’t a one-time purchase; it’s a routine. By implementing these three physical layers—Hitch, Wheels/Chassis, and Interior Valuables—you drastically raise the time, effort, and risk associated with stealing your RV, ensuring that your home-on-wheels is the least attractive target on the lot. Your layered approach turns your RV from a target of opportunity into a high-risk time sink, making the thief move on to someone else’s easier mark.
What are your favorite budget-friendly physical deterrents, or the most advanced anti-theft tech you’ve installed on your rig? Let us know in the comments below!
\ Get the latest news /
Related Posts
RV Security 2025: Theft Prevention, Smart Locks, and Travel Safety Systems for Modern RVers
The modern RV lifestyle is defined by freedom, connectivity, and…
RV Jack Essentials: Why They Matter and Best Practices for Every Traveler
Learn everything about RV jacks — why they’re essential, how…
How to Winterize Your RV the Right Way: A Complete Step-by-Step Guide
Protect your RV from freeze damage with this complete step-by-step…
2 Replies to “The 3 Simple Layers of Physical Security That Make Thieves Skip Your RV”