Learn everything about RV hookups — water, power, and sewer — with this step-by-step guide for beginners. Avoid common mistakes and enjoy a clean, comfortable setup every time.
Introduction
Your first full hookup experience can feel like a science experiment: three hoses, two adapters, and a tangle of cords. But once you know the right order — and a few pro tricks — it becomes simple, clean, and even kind of satisfying.
This guide breaks down how to safely connect RV water, power, and sewer hookups, plus what to do before, during, and after each trip. By the end, you’ll handle hookups like a seasoned full-timer.
💬 Because once you master your hookups, every campsite feels like home.
⚡ 1. Understanding Full Hookups vs Partial Hookups
Before diving in, know what your campsite offers.
Full Hookup:
Includes water, power, and sewer directly at your site.
Partial Hookup:
Usually water and power only (dump station on-site).
Boondocking (Dry Camping):
No hookups — you rely on onboard tanks and power.
💬 Pro Tip: Always confirm what hookups a site offers before arrival. Not every “RV site” includes all three.
💧 2. Hooking Up Fresh Water
Water is the most-used utility — and also the easiest to contaminate if done wrong.
You’ll Need:
- Drinking-water-safe hose (white or blue)
- Inline water filter
- Water pressure regulator
- Elbow connector (optional, prevents strain on the inlet)
Step-by-Step Setup
- Locate your “City Water Connection” port.
- Attach the pressure regulator to the campground spigot.
- Connect the inline filter to the regulator.
- Attach your drinking-water hose from the filter to your RV.
- Turn on the water slowly while checking for leaks.
💬 Pro Tip: Always use the pressure regulator — campground water can exceed 80 PSI and damage your RV plumbing.
🚱 3. Using Your Fresh Water Tank
If you’re boondocking or want backup water:
- Fill your fresh water tank using the “Fresh Fill” inlet.
- Close the valve after filling.
- Turn on your water pump when not connected to city water.
💬 Budget Tip: Keep your tank about ⅓ full while traveling for emergencies (like dry campgrounds or broken spigots).
💦 4. Managing Gray and Black Tanks
Your RV has two wastewater tanks:
- Gray tank: Sink and shower water
- Black tank: Toilet waste
These connect to a single dump outlet under your rig.
💬 Golden Rule: Keep both tank valves closed while camping. Only open them to dump — leaving them open allows solids to dry and clog.
🚰 5. Hooking Up the Sewer Line (Without the Mess)
No part of RVing causes more anxiety than this one.
But done right, it’s clean, fast, and odor-free.
You’ll Need:
- Heavy-duty sewer hose (20 feet)
- Clear elbow adapter
- Sewer donut or fitting (required in many parks)
- Disposable gloves
Step-by-Step Setup
- Attach the sewer hose firmly to your RV outlet.
- Insert the other end snugly into the park sewer drain (use the donut for a seal).
- Keep both valves closed until tanks are at least ⅔ full.
- To dump:
- Open black tank valve first.
- Wait until empty.
- Close it.
- Open gray tank next — it flushes the hose.
- Rinse, disconnect, and cap ends before storing.
💬 Clean Tip: Use a separate labeled bin for sewer gear. Never mix with fresh-water items.
🔌 6. Connecting Electrical Power
Electricity keeps your lights, fridge, and A/C running — but it’s also where many first-timers make dangerous mistakes.
You’ll Need:
- Surge protector (or EMS)
- Correct power cord (30-amp or 50-amp)
- Adapter “dog bone” (if needed)
Step-by-Step Setup
- Check your rig’s amp rating — it’s listed near your power inlet.
- Inspect the pedestal and confirm matching outlet.
- Turn pedestal breaker OFF before plugging in.
- Plug in your surge protector, then your power cord.
- Turn the breaker ON.
💬 Safety Tip: Never touch live plugs with wet hands. Always power down before connecting or disconnecting.
⚡ 7. 30-Amp vs 50-Amp Explained
- 30-Amp: 120 volts x 30 amps = 3,600 watts max (1 A/C unit).
- 50-Amp: 240 volts x 50 amps = 12,000 watts max (2+ A/Cs, washer, etc.).
💬 Power Tip: If you plug a 50A RV into a 30A pedestal, you’ll need a proper adapter — but limit your power use to one major appliance at a time.
🔋 8. Testing Your Electrical Setup
Once plugged in, test:
- Interior outlets
- Fridge (switch to “Auto” mode)
- A/C and microwave (try one at a time)
💬 Pro Tip: Keep a small outlet tester handy — it shows grounding and polarity issues instantly.
🪠 9. Cable, Internet, and Satellite Hookups
Many campgrounds offer TV or internet connections at the pedestal.
To Use:
- Find the park’s cable outlet.
- Connect coaxial cable to your RV’s “Cable In.”
- Set TV input to “Cable” and run a channel scan.
💬 Upgrade Idea: A portable Wi-Fi booster extends weak campground signals dramatically.
🧯 10. Common Hookup Mistakes (and How to Avoid Them)
Mistakes happen — but they don’t have to ruin your stay.
| Mistake | Problem | Solution |
|---|---|---|
| Forgetting pressure regulator | Burst pipes | Keep one attached to hose permanently |
| Leaving sewer valve open | Clogs & odors | Keep closed until ready to dump |
| Plugging in with breaker on | Electrical shock | Always turn OFF before connecting |
| Mixing hoses | Contamination | Label fresh vs gray/black clearly |
| Overloading circuit | Power tripping | Stagger A/C, microwave, and coffee maker use |
💬 Pro Tip: Color-code everything — white = fresh, black = waste, orange = power.
🧴 11. How to Disconnect Hookups Safely
Leaving the campground should be as smooth as setup.
Order of Disconnection:
- Turn OFF electrical breaker and unplug cords.
- Close water spigot, drain hose, and stow dry.
- Dump and flush sewer tanks last.
- Cap all inlets and stow hoses separately.
💬 Pro Tip: Keep paper towels and disinfectant wipes on hand for cleanup.
💦 12. Sanitizing Your Fresh Water System
At least twice a year, sanitize tanks to prevent algae and bacteria.
Quick Method:
- Mix ¼ cup bleach per 15 gallons of water.
- Fill fresh tank.
- Run faucets until you smell bleach.
- Let sit 4 hours, then drain and flush twice.
💬 Natural Option: White vinegar works too — less odor.
⚙️ 13. Troubleshooting Common Hookup Issues
| Issue | Cause | Fix |
|---|---|---|
| No water flow | Kinked hose or bad filter | Check connections, replace filter |
| Power flickering | Loose plug or low voltage | Tighten, test with multimeter |
| Sewer odor | Open valve or dry trap | Close valve, add water to trap |
| Weak A/C | Low voltage | Switch to generator or reduce load |
💬 Tip: Keep a small toolkit with Teflon tape, spare fuses, and an extra hose washer — they fix 90% of problems.
🏕️ 14. Boondocking Without Hookups
You can still enjoy comfort when off-grid.
Key Strategies:
- Use solar panels or generators for power
- Conserve water with low-flow shower heads
- Dump tanks before heading out
- Carry collapsible water jugs for refills
💬 Budget Tip: Many RVers use state park dump stations for $5 or less.
🧠 15. Hookup Etiquette (Campground Courtesy)
- Don’t stretch hoses across neighbor lots.
- Coil cords neatly — trip hazards = bad form.
- Don’t dump tanks late at night or during quiet hours.
- Always clean up drips around sewer hookups.
💬 Respect earns respect — and helpful neighbors.
🪙 16. Upgrading Your Hookup Setup
Small investments make a big difference:
- Quick-connect fittings for hoses
- High-flow filters
- Retractable cord reels
- Heated hoses for winter camping
💬 Luxury Tip: Add a surge-protected power panel inside your RV for safe power management.
🧾 17. Create a “Hookup Bag”
Keep all gear organized and separate from other tools.
Label and Store:
- Power (orange bag)
- Water (blue bag)
- Sewer (black bag)
💬 Pro Tip: Store them in opposite compartments to avoid contamination.
🚐 18. Practice Makes Perfect
Try setting up in your driveway or a local park before a long trip.
Each RV has its quirks, and muscle memory will make future setups easy.
💬 Confidence is built through repetition — not rushing.
🌦️ 19. Hookups in Bad Weather
Rain or freezing temps? No problem.
Tips:
- Wear rubber gloves and boots
- Use a headlamp at night
- Carry a tarp for kneeling on wet ground
- Use heated hoses in winter
💬 Pro Tip: Disconnect and drain hoses below 32°F to prevent freezing.
🔋 20. Final Hookup Checklist
✅ Level RV
✅ Plug in power (breaker off → plug → breaker on)
✅ Connect fresh water (with regulator & filter)
✅ Connect sewer (valves closed until dump)
✅ Test all systems
✅ Store hoses neatly
💬 Print this checklist and laminate it — your future self will thank you.
Conclusion
Hooking up your RV doesn’t need to be stressful.
With a little practice and a clear process, you’ll connect safely and efficiently — every time.
💬 Because once your hookups are done right, you can focus on what really matters — enjoying the adventure ahead.
Coming Soon on RVBudget.com
“RV Water Systems Explained: How to Keep Fresh, Clean, and Odor-Free Water on the Road.”
Includes:
- Water system diagrams
- Filter recommendations
- Printable hookup checklist
📩 Sign up for free guides and RV travel tools at RVBudget.com.
Tags
rv hookups, rv water hookup, rv sewer connection, rv electrical hookup, 30 amp vs 50 amp, rv camping setup, full hookup rv sites, rv sanitation tips, rv power safety, rvbudget.com setup guides
\ Get the latest news /
Related Posts
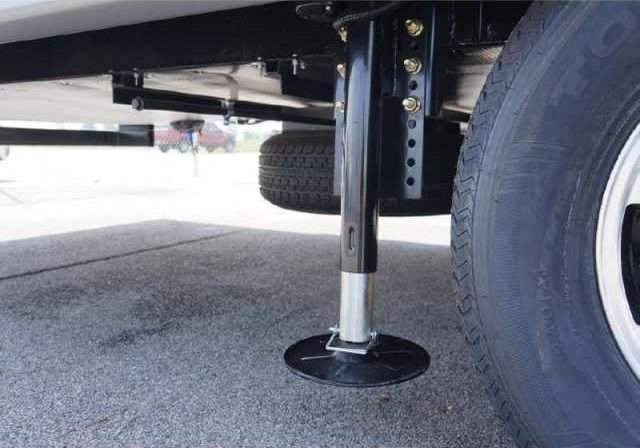
RV Jack Essentials: Why They Matter and Best Practices for Every Traveler
Learn everything about RV jacks — why they’re essential, how…
RV Maintenance Mistakes New Owners Make (and How to Avoid Them)
New to RVing? Learn the top RV maintenance mistakes beginners…
The 3 Simple Layers of Physical Security That Make Thieves Skip Your RV
If you follow the RV lifestyle, you know the freedom…